
In a previous article, we documented how to connect Azure Storage File Shares to Triofox. This article documents how to set up Azure Storage Account with local Active Directory authentication with NTFS permissions.
Please reference this Microsoft document for on-premises Active Directory Domain Services authentication over SMB for Azure file shares.
What we will be setting up is following the above Microsoft knowledge base article.
The Diagram
1. The two green boxes are in the Microsoft Azure portal, including the Azure Active Directory and Azure Files SMB Shares (or File Shares inside Azure Storage Accounts)
2. Two VMs. The blue one represents an existing local active directory, and the orange one represents a Triofox server (or a Triofox server farm)
3. On the Local Active Directory Server, we installed the "Azure Active Directory Connect" program. The Azure Active Directory Connect synchronizes local active directory accounts and information to Azure Active Directory.
4. We join the Triofox server to the local Active Directory domain
5. We follow the article in the above-referenced Microsoft KB and set up the Azure storage account to use local AD DS for authentication.
6. Triofox has outbound port 445 open, so it can do "net use" API to connect to the SMB file shares in the Azure storage account.

Step 1 - Install Azure Active Directory Connect on the Domain Controller (Local AD)
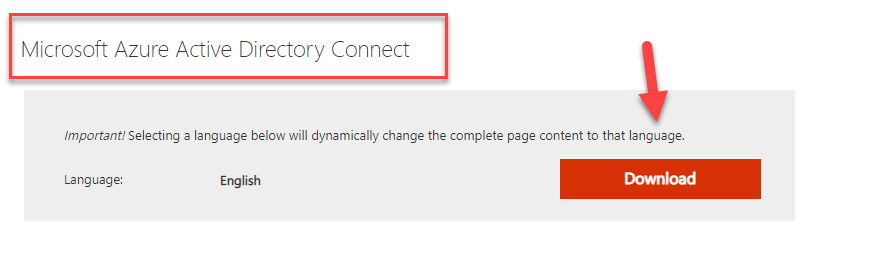
There are two different kinds of Azure AD Connect. One is called "Microsoft Azure Active Directory Connect" you can search for it, download it directly from the Internet, and save it on the local domain controller server.
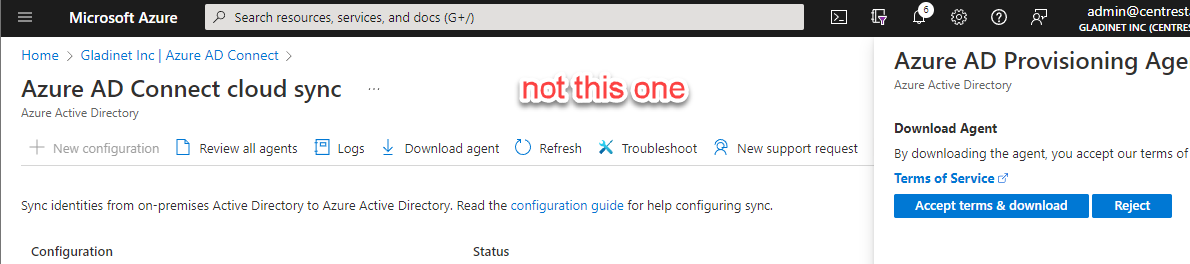
If you start from within the Azure Active Directory portal, you may stumble upon a different AD connect agent called "Azure AD Provisioning Agent". We will not use the "Azure AD Provisioning Agent." Don't use this one, but use the above "Microsoft Azure Active Directory Connect" instead.
Microsoft Azure Active Directory Connect is a pretty straightforward install and setup. There is a couple places to be careful
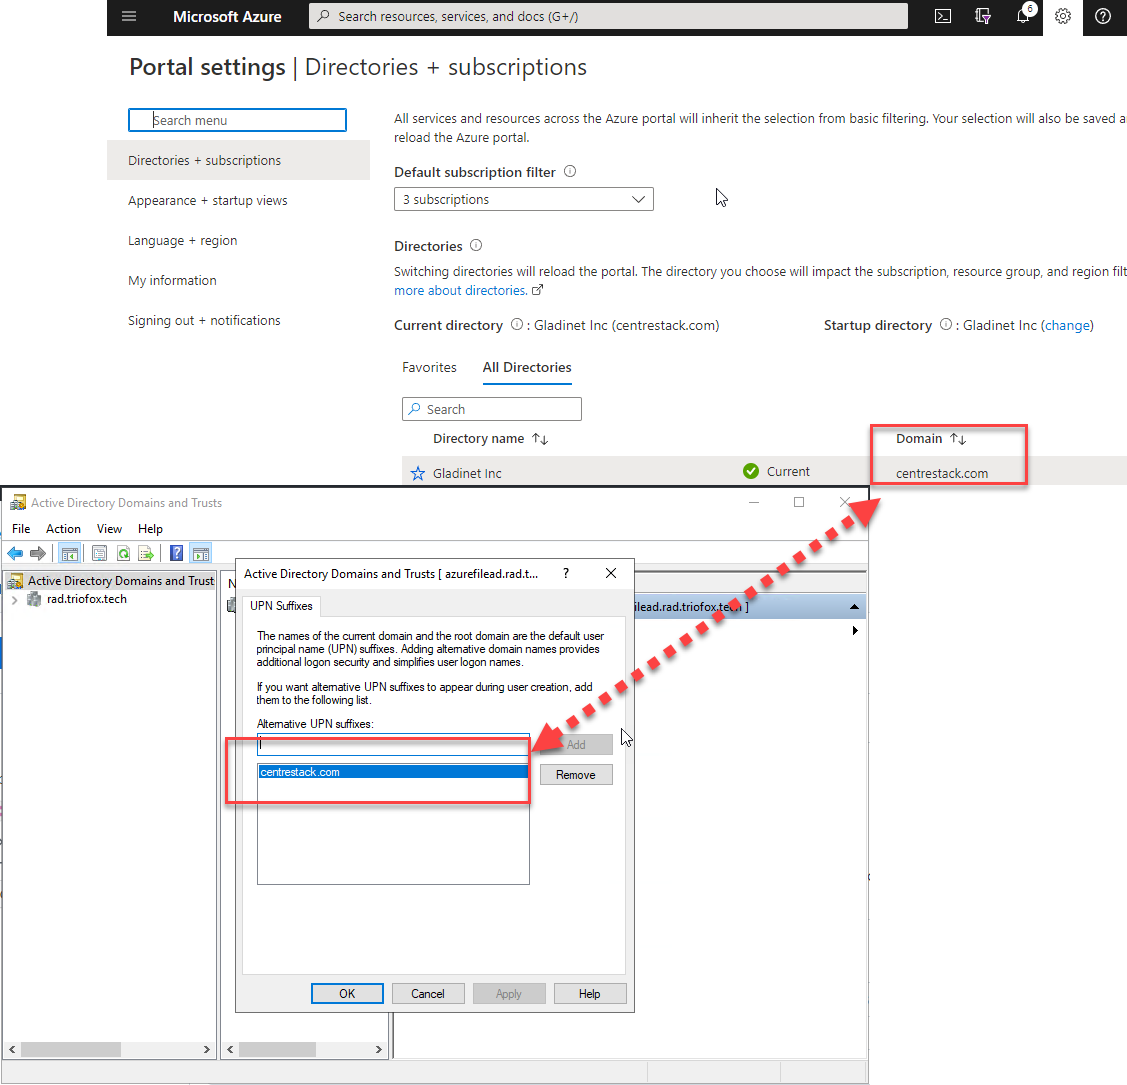
1.1 - make sure you set up the UPN Suffix to match the Azure Active Directory Name
You need to go into the local "Active Directory Domains and Trust" tool and make sure the UPN suffix matches the Domain setting inside the "Azure Active Directory."
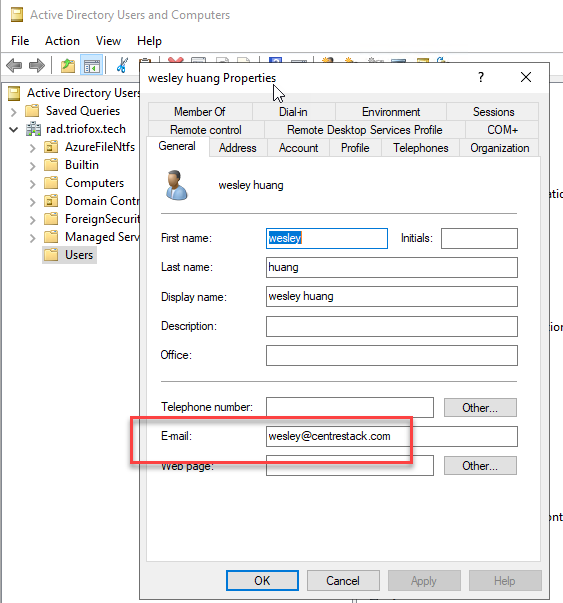
1.2 - make sure you pick an attribute such as "mail" to sync as the UniversalPrincipleName and the attribute is actually populated.
For example, in the following screen, the domain is verified first, and then the "mail" attribute is selected to sync as the "User Principle Name" in the Azure Active Directory. It doesn't have to be the mail attribute but prefers an attribute that matches the Azure AD Domain suffix.

If you use the "mail" attribute as the User Principal Name, make sure the mail attribute is populated first.
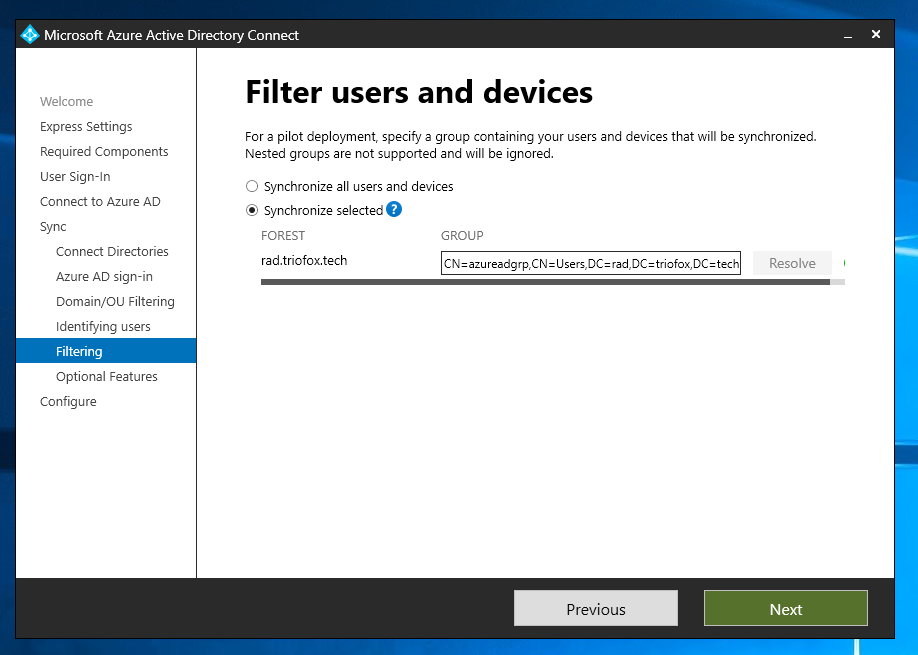
After that, you will specify an OU filter for AD Connect synchronization; after that, you can select group filtering. So you can pick users from a specific Organization Unit and, inside, further identify users that can synchronize to Azure AD. In this exercise, we didn't specify OU but specified a group to sync to the cloud.
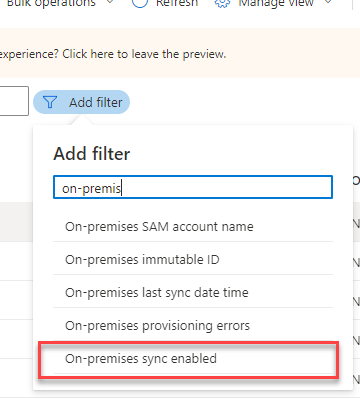
1.3 - How to verify that the Azure Active Directory Connect is working?
You will go to the Azure Active Directory portal page and find users with "On-premise Sync Enabled."

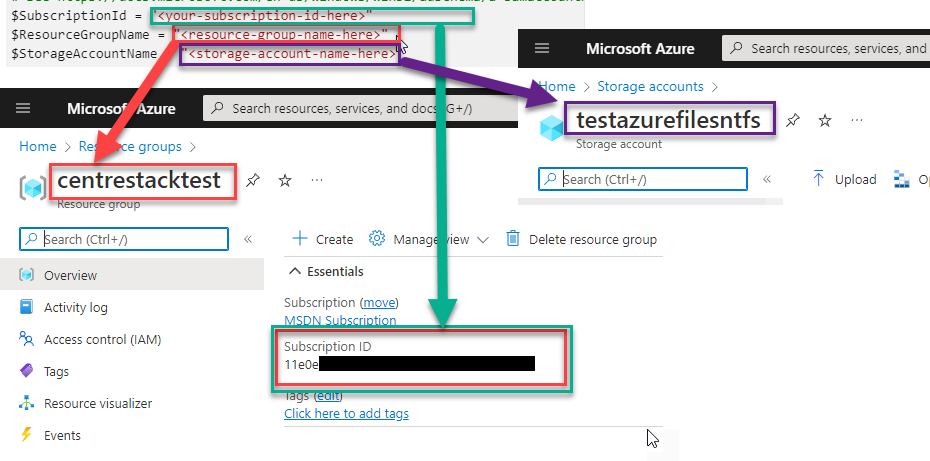
Step 2 - Prepare the Storage Account with Local Active Directory Authentication
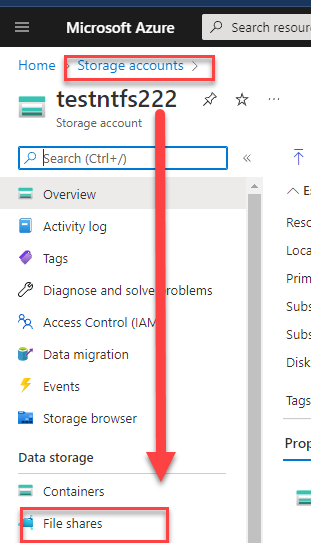
You will use the "Storage accounts" to create a new Azure Storage Account if not already. and create a File Share too if not already.
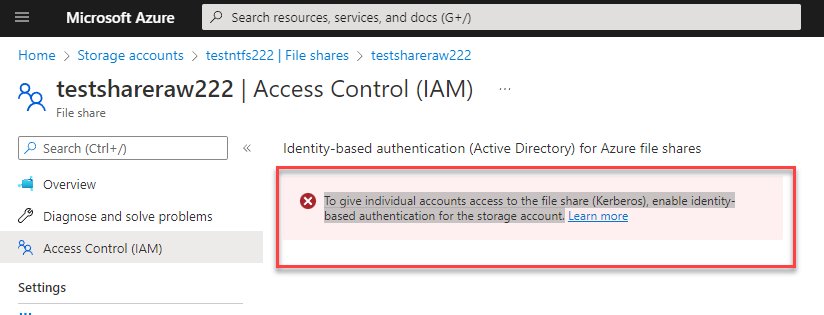
The first time you browse into the File Share and into the "Access Control (IAM)" area, you will see a message - "To give individual accounts access to the file share (Kerberos), enable identity-based authentication for the storage account.". We will need to follow the KB article from Microsoft to set up the local active directory as the AD DS-based authentication for this storage account.
Step 2.1 - Run the AzFilesHybrid module as documented
The steps are written in this Microsoft KB article - Part one: enable AD DS authentication for your Azure file shares
you can open the KB article and scroll to the section started with the PowerShell (copy) section.

All these steps run inside a PowerShell command line prompt inside the local active directory machine. As shown below, four commands are issued from within the PowerShell command prompt.
You can type them in one after the other. The third command, Import-Module, may prompt you that you will need to update a PowerShellGet module with some error message. and if you tried to run the Connect-AzAccount, it also failed. If that is the case, close the PowerShell command prompt and run these commands again.

Below is a PowerShell command line session that runs the above four commands, but the PowershellGet module needs an update, so it failed. and simply close the PowerShell window and start over again will resolve it.

After the above four lines of commands, you will then prepare the following three lines:
After the above three lines of PowerShell commands were executed, now there are two more lines left:
Select-AzSubscription -SubscriptionId $SubscriptionId


And the last line of
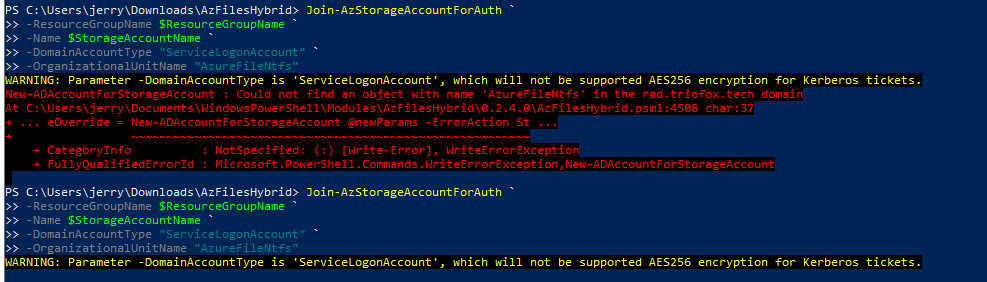
Join-AzStorageAccountForAuth
Below is an example execution of Join_AzStorageAccountForAuth, which used an OganizationUnitName. Make sure the OU is pre-created. Otherwise, you will see a similar error that complains that the OU doesn't exist.
For easy reference: here is the command run in text format:
Join-AzStorageAccountForAuth `
-ResourceGroupName $ResourceGroupName `
-Name $StorageAccountName `
-DomainAccountType "ServiceLogonAccount" `
-OrganizationalUnitName "AzureFileNtfs"
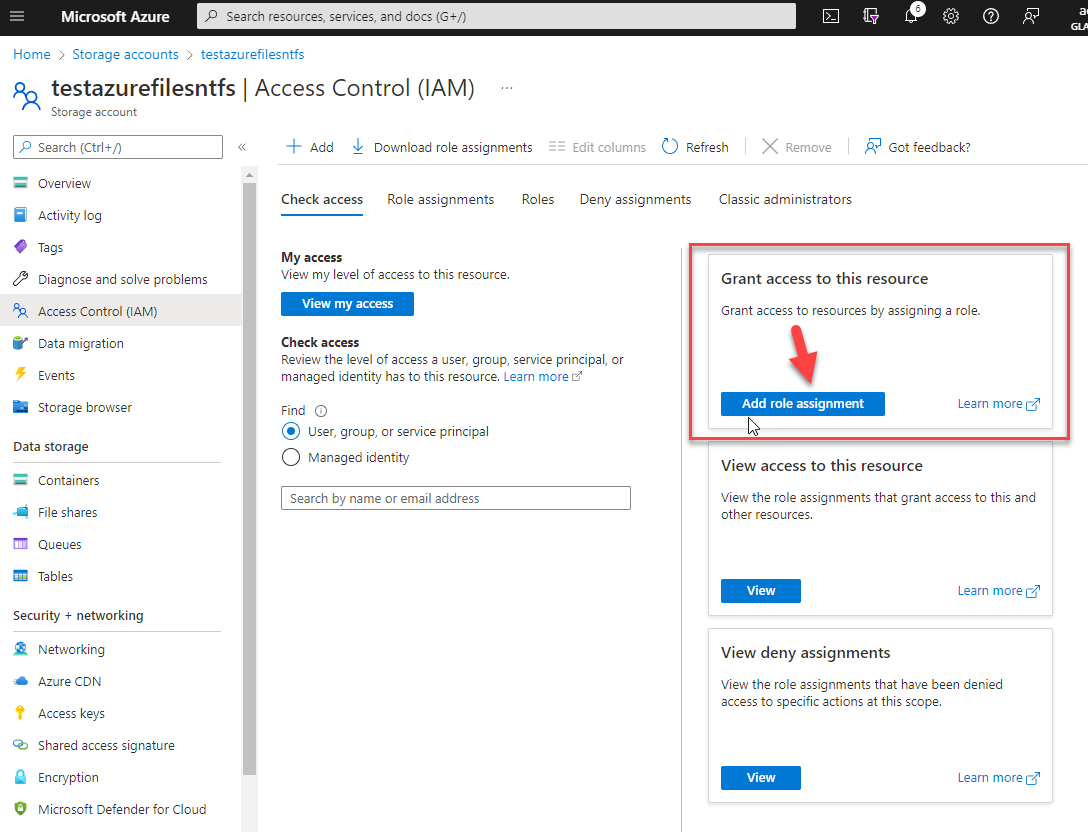
Step 2.2 - How to verify that step 2 is successful?
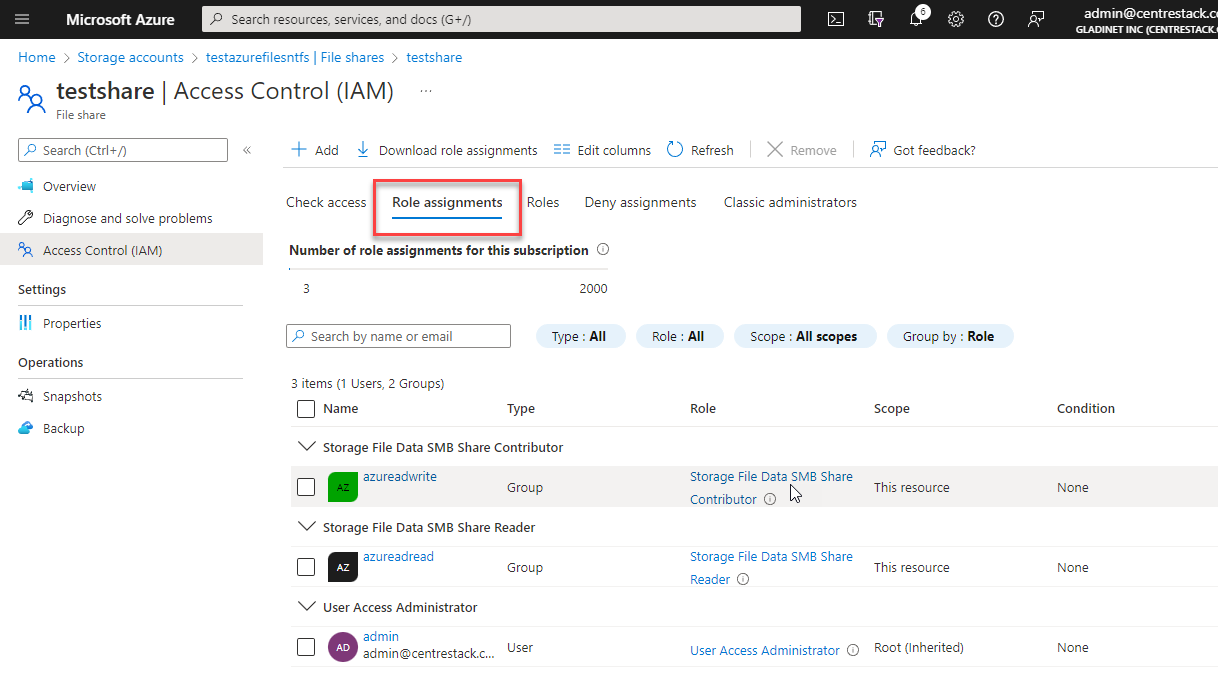
Once the above steps are done, you will see a different screen once you are back into the "Access Control (IAM)" section of the Azure File Share. You can see now that the "Add role assignment" is visible.
You can also cross-reference another blog, similar to following the Microsoft KB article.
You can also cross-reference another youtube video, which also followed similar steps.
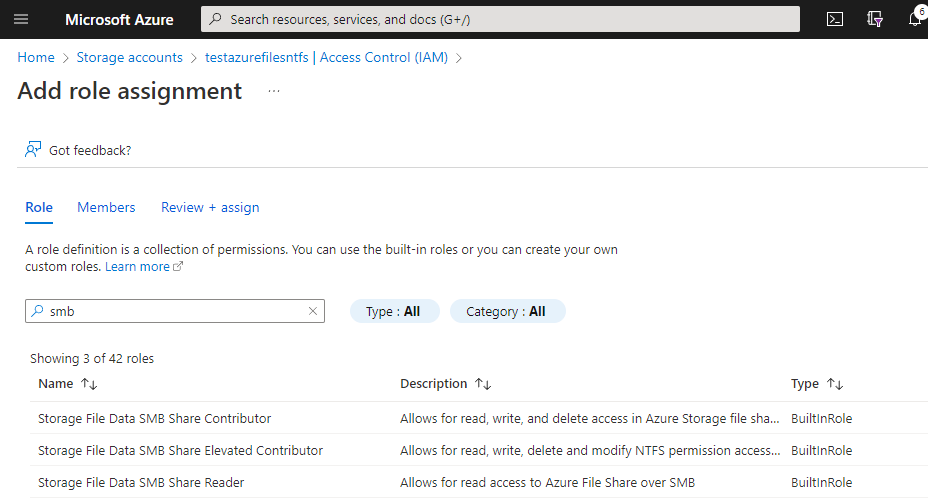
Step 3 - Set the Share Level Permission with Roles
Unlike traditional NTFS permissions, as an administrator, you select users and immediately assign read/write/modify/full control to users. In Azure File Share, you will see roles first.
If you filter by "SMB," you will see three roles, Contributors, Elevated Contributors,s, and Reader. It may not be accurate, but we would like to remember these roles as
- Contributor = read + write to files and folders
- Elevated Contributor = kind of like a share owner, not only can read and write, but also set NTFS permissions
- Reader = read-only access.
We will need to add these roles and map them to on-premise Active Directory groups.
For example, below is one such way of assigning roles to the shares, the Contributor role is mapped to the local azureadwrite group, and the Reader role is mapped to the local azureadread group.
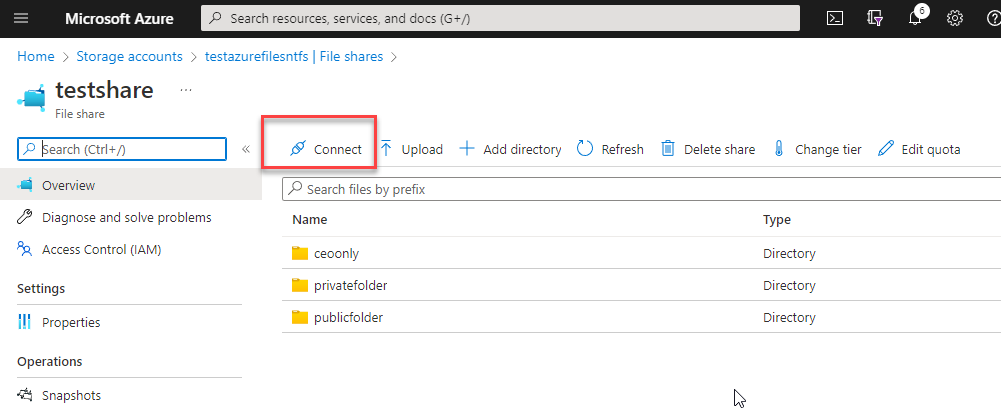
Step 4 - Set the folder level permission
You will set the folder level permission by mounting the share as a share inside a Windows Explorer.
From the below screenshot, you can use the Connect button to get the share mounting instruction from a local domain joint machine, which also has direct port 445 access to the Azure file network share. After that, you can use the normal "Security" tab to manage permissions.
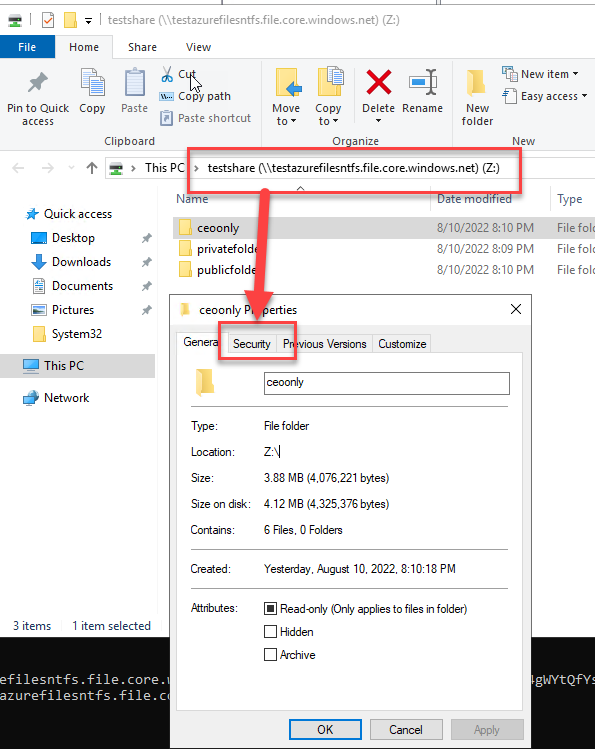
As shown in the below screenshot, the share is mounted on the domain controller and the permission can be set from the "Security" tab.
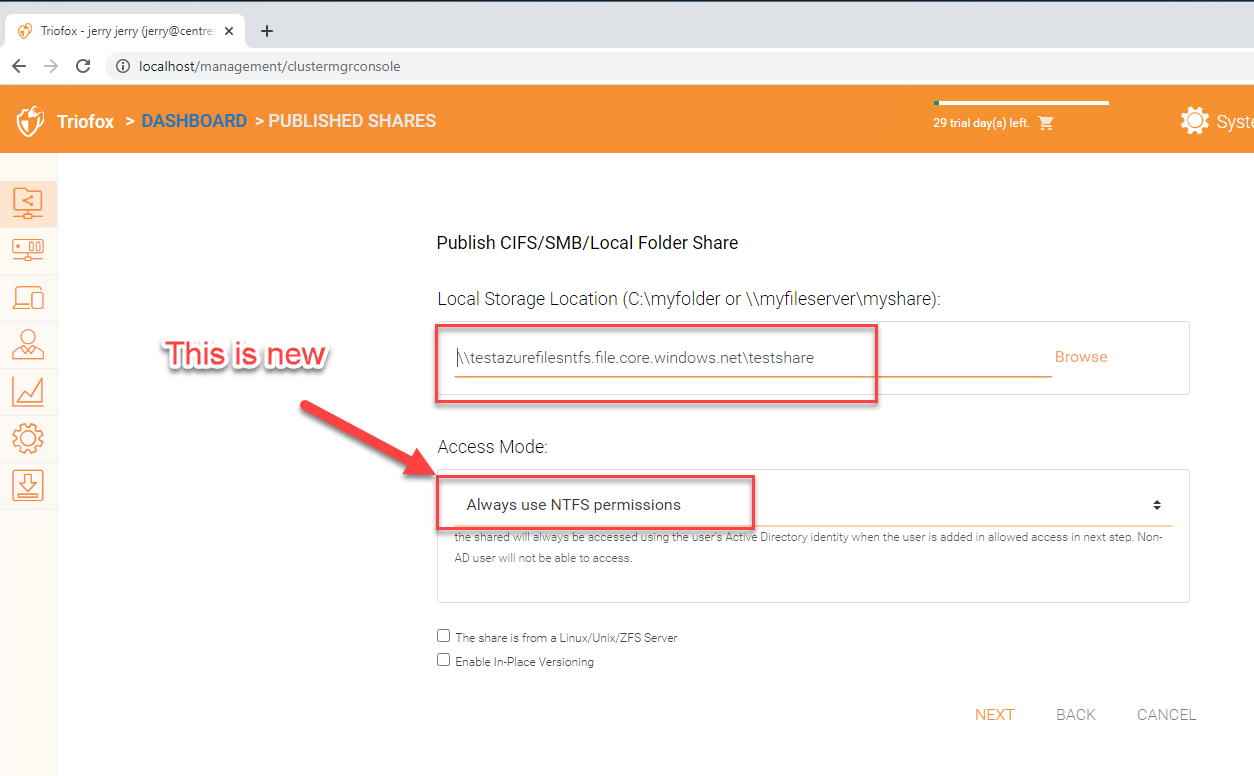
Step 5 - Triofox connects to Azure Files
This part is easier now because the "Always use NTFS permissions" option is viable.
Comments
0 comments
Please sign in to leave a comment.